Introduction
Most of you who see this post will have seen the original UNIAC post before this, and hopefully some will have seen the post detailing the hardware. For those who haven’t, UNIAC is a Raspberry Pi based Spotify playing boombox that is controlled with buttons on the front and displays status using Nixie tubes. This post will cover the software used to make UNIAC work — both tools developed by others and the software I wrote myself.
While I am writing this from the perspective of documenting UNIAC, the software could be pretty easily recycled to work with any display and buttons, you’d just have to rewrite the display and button event functions to support your hardware.
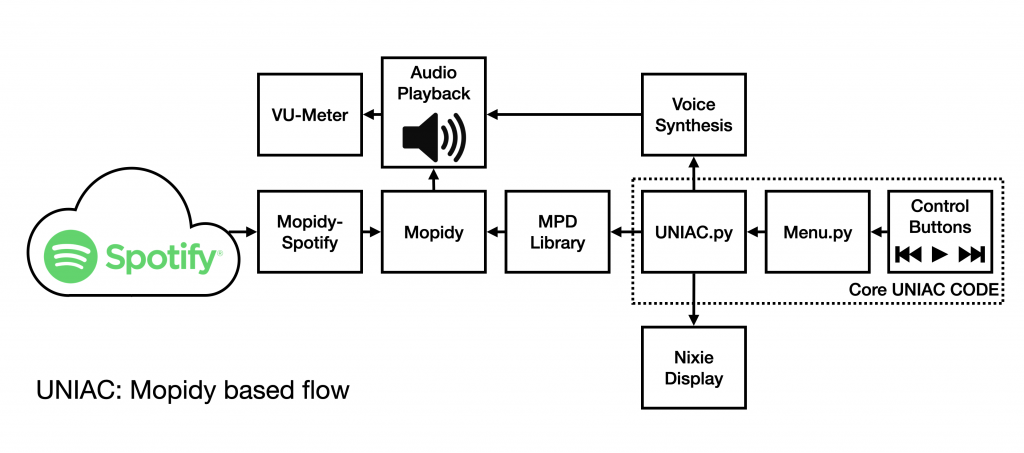
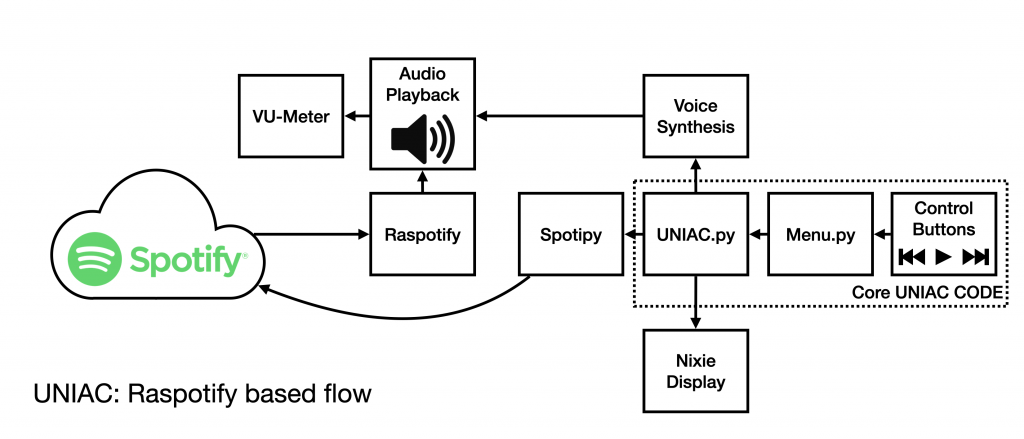
Also note that I did a major ripup of the UNIAC software after the original post, so this version does not use Mopidy, MPD, or Mopidy-Spotify. And if any of you have used those tools before, you’ll understand that’s a good thing.
I will start with a disclaimer however: I am an electrical engineer, not a software engineer, so this design will probably make software guys sick to their stomach. Sorry in advance…
Third Party Software
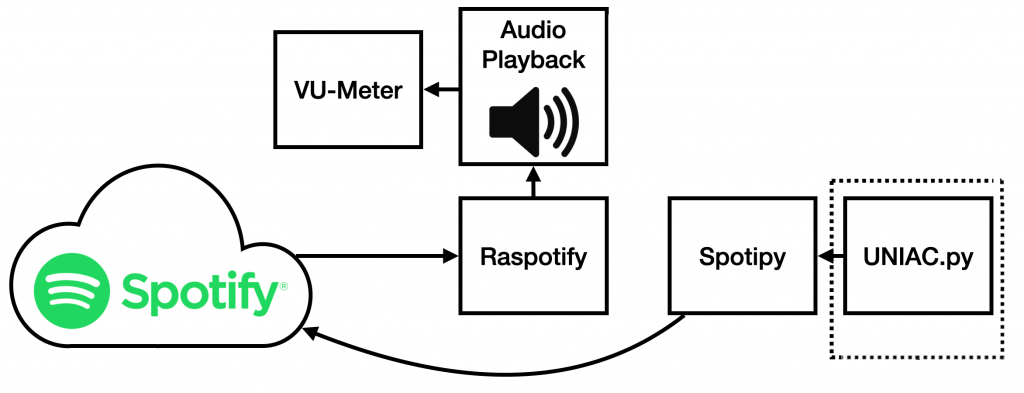
The first thing to understand about the architecture used in UNIAC is that control and playback of music are two separate processes. Raspotify is a software package that connects to Spotify and makes your RPi act as a Spotify endpoint. Essentially a dedicated speaker. There are a couple of similar packages that can give you a Spotify client on a RPi, but Raspotify has a trivial installation process:
curl -sL https://dtcooper.github.io/raspotify/install.sh | shThe second part, Spotipy, is a Python library that you give permissions on your (paid) Spotify account. It allows you to see current playback status, and control playback on your Spotify devices (computers, speakers, etc). By combining these two, you can have a full Spotify instance running on your device with programmable control.
The two pieces are connected by the UNIAC Python script. UNIAC sets up a spotipy connection and then controls what device the playback occurs on. Since the name of the UNIAC Raspotify instance is constant, it simply has to tell Spotify to playback there, and music will play on the UNIAC hardware. This has the added benefit that I can ‘cast’ whatever I’m currently listening to over to UNIAC and it will just continue to play.
The last piece worth mentioning is eSpeak, a relatively primitive speech synthesizer that takes strings from the command line and announces them. This lends UNIAC its characteristic robot voice when announcing settings information and playlist names.
Hardware Libraries
The hardware interfaces are pretty straightforward, mostly. The buttons are controlled by an i2c GPIO expander, and Adafruit has the MCP230XX library to support it. For other GPIO, I use RPi.GPIO.
The last, and most unique library is the NixieDisplay library. It is a custom library that I developed to communicate with my Teensy 3.2 based multiplexing, crossfading Nixie display. In the first prototype, I used Taylor Edge SmartNixie modules instead of my custom display, so I also wrote a library supporting them on the RPi, though I’m not using it on the finished version.
These libraries are pretty straightforward. You print numbers to the tubes to display and forget about it.
The VU-Meter only has an audio input, so it doesn’t have any software control and doesn’t appear on any of these block diagrams.
UNIAC Software Architecture
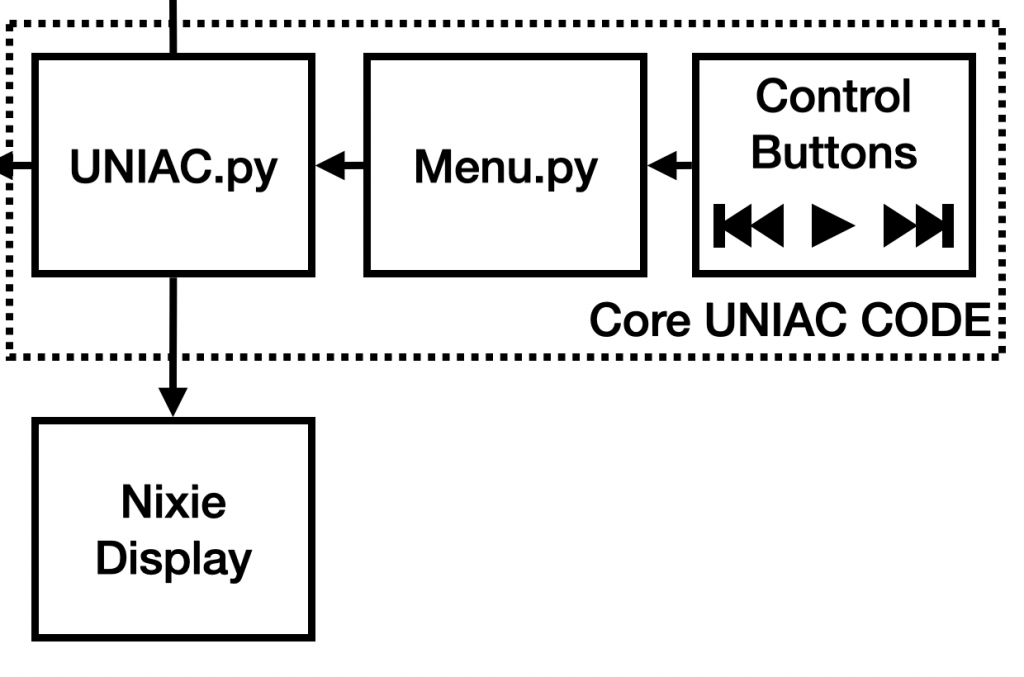
The UNIAC software is essentially an interrupt driven button handler. There is a master ‘Menu’ class in Menu.py to which arbitrary ‘Modes’ are attached. An attached mode must provide a function handler for each physical button as well as a display update handler (and a few other helper functions).
When a button is pressed, the Menu object calls the current Mode’s handler for that button.

The UNIAC.py script creates a Menu instance and attaches the modes defined in that script. The modes (currently) are: clock, track time, date, alarm clock, change playlist, and options.
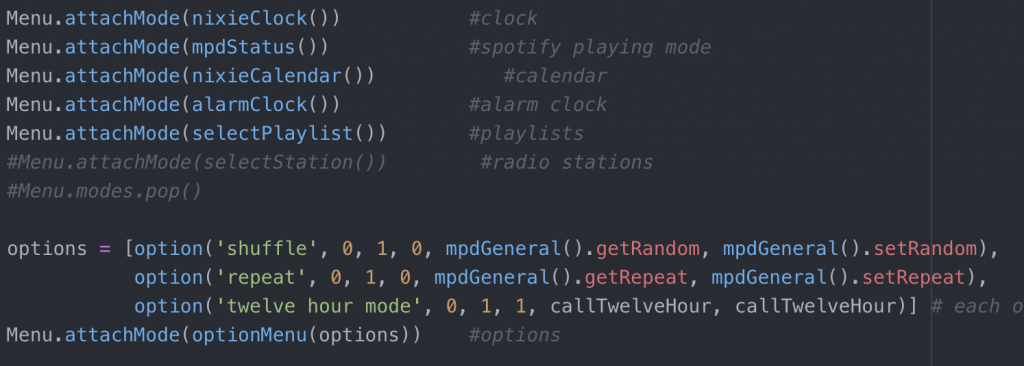
For instance, when the ‘Plus’ button is pressed in the track time mode, the menu object will use Spotipy to progress to the next track, but when ‘Plus’ is pressed in the alarm mode, it will advance the alarm time by one.
The ‘Mode’ button is a special case that does not call an attached handler function but instead changes the selected mode in the Menu object.
The Menu object also requires that each mode have a display update handler. This handler is called by the master UNIAC.py script in an infinte loop to update the display every 100 ms.

This code was actually based off of another (unfinished) project of mine which used two buttons and a character LCD. By changing the displayUpdate function and the button handlers, this script could be used for virtually any menu interface with multiple ‘pages’.
Interfacing with Spotipy
As discussed in the preceeding section, UNIAC is controlled through a series of button handlers. To interface with Spotipy, most of the modes used in UNIAC inherit from the mpdGeneral class.
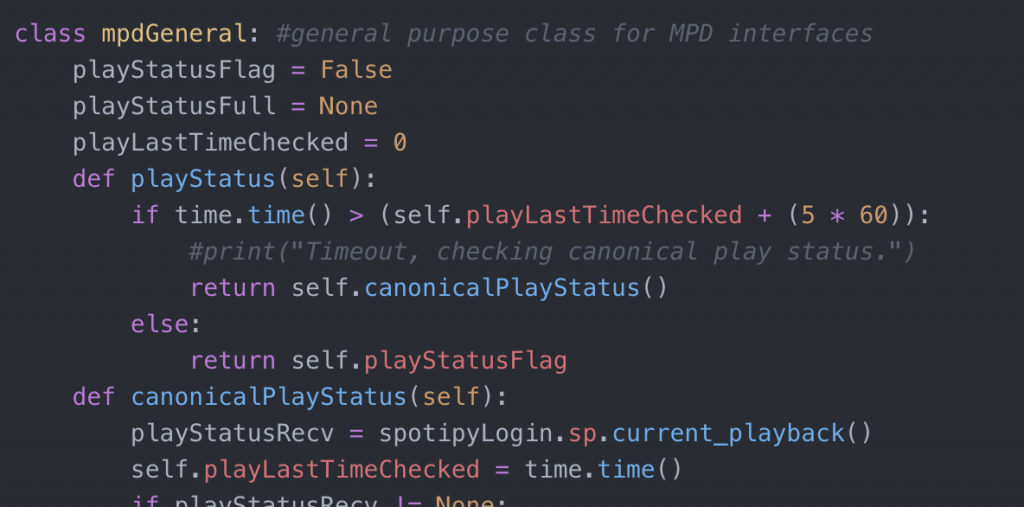
This class has a few static variables and references the globally available spotipyLogin.sp object, which is an instance of the bare Spotipy API created by the spotipyLogin.py script. It includes things like track status, play, pause, loading a defined playlist from URI, listing available playlists, et cetera.
The UNIACConfig class allows settings like alarm time, current playlist, and settings to be pickled to a config file and loaded on restart. The other classes (including the option menu mode) use this class to handle i/o to the settings file, ‘UNIAC.conf’.
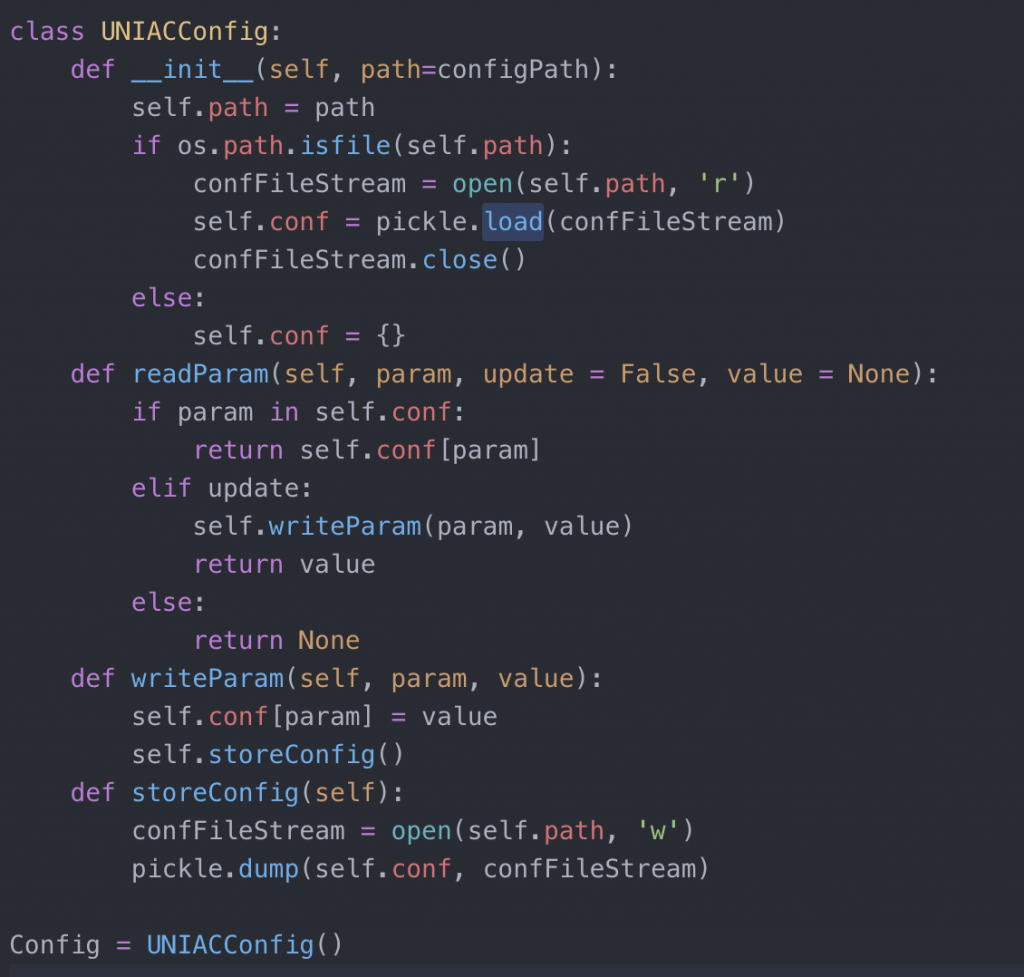
The remainder of the classes are more or less straightforward implementations of their self explanatory modes and hook the various parts and pieces together.
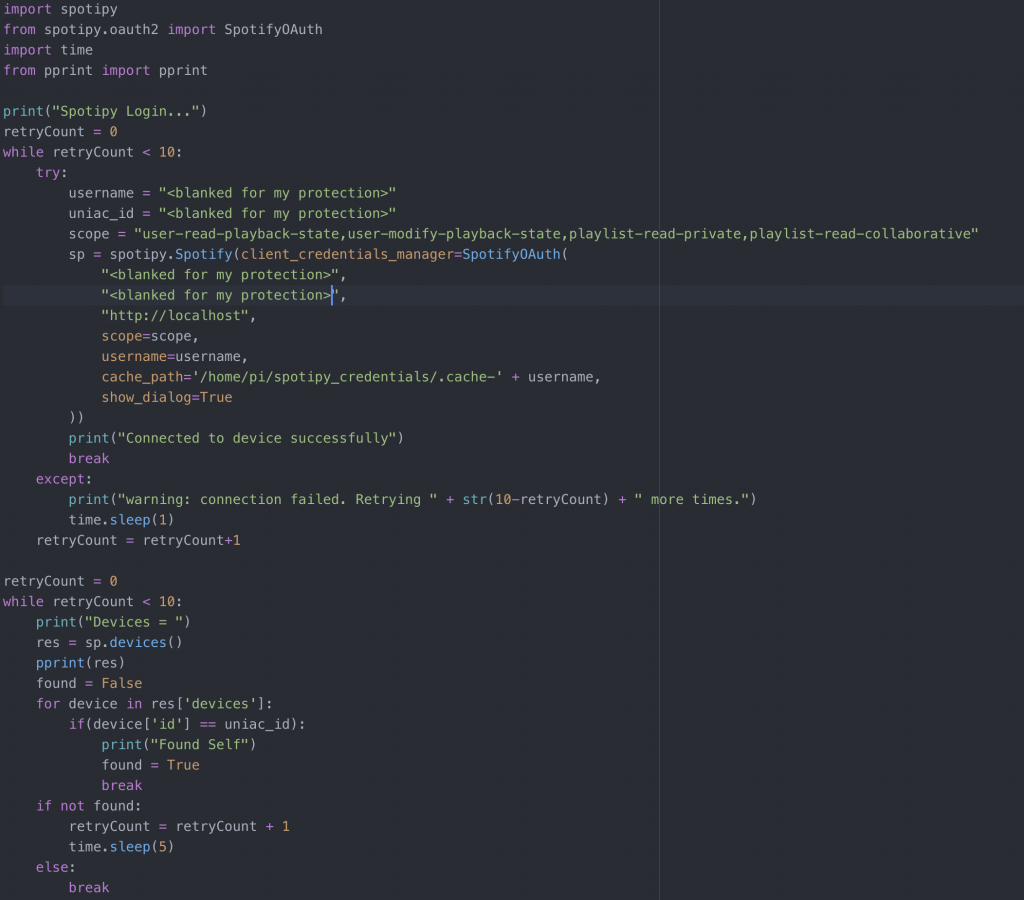
The last piece of secret sauce, which is not on git, because it is in m gitignore is spotipyLogin.py, a simple script which holds my Spotify login credentials and makes a logged in Spotipy object available.
UNIAC Supervisor
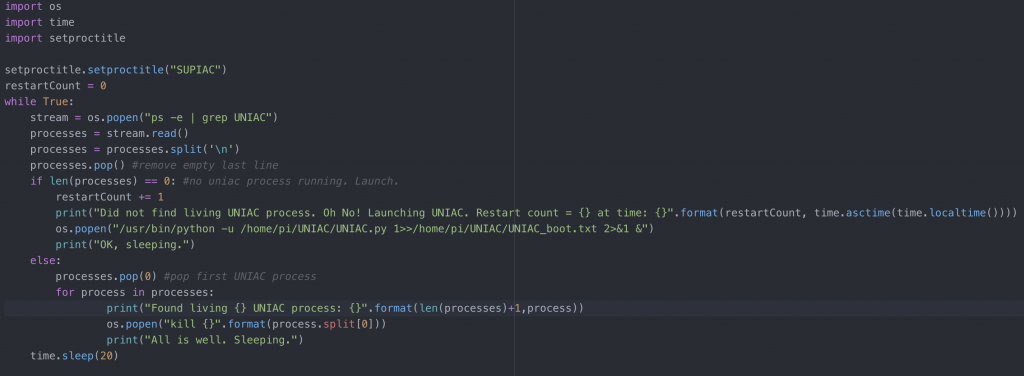
Finally, there is a UNIAC supervisor script. This is an independent Python process which checks if the UNIAC script is running and if not launches it. It also checks that only one instance of the script is running, and if a second copy has started somehow, kills all but the first process. It’s not strictly necessary, but is a nice-to-have feature. I ran without it for years, with only occasional failures.
Conclusion
The UNIAC software is a combination of several bits and pieces of code which allows a button driven paged menu system to control the Spotify web API and stream music for plaback locally on the RPi, as if it were a commercial product. The interface is ideally suited to a ‘Nixie Boombox’ but could be used with any oddball display you wanted with a little modification.
Thanks for reading.

