A few months ago, I was thinking about the best way to build enclosures for my projects. My go-to has been the ‘acrylic sandwich’ method, where I laser cut a handful of pieces of acrylic and bolt them to my PCB with standoffs.
This looks reasonably good. More professional than hand built project enclosures, and less cookie-cutter than using a standard project box. But it has its drawbacks and limitations. You can cut slots in the front and back of your project and then use the tension in the standoffs to hold side panels in place, but these slots have to have a fair bit of slop in them as the thickness of acrylic sheets varies fairly significantly from manufacturer to manufacturer and even seems to vary lot to lot from cheap vendors.
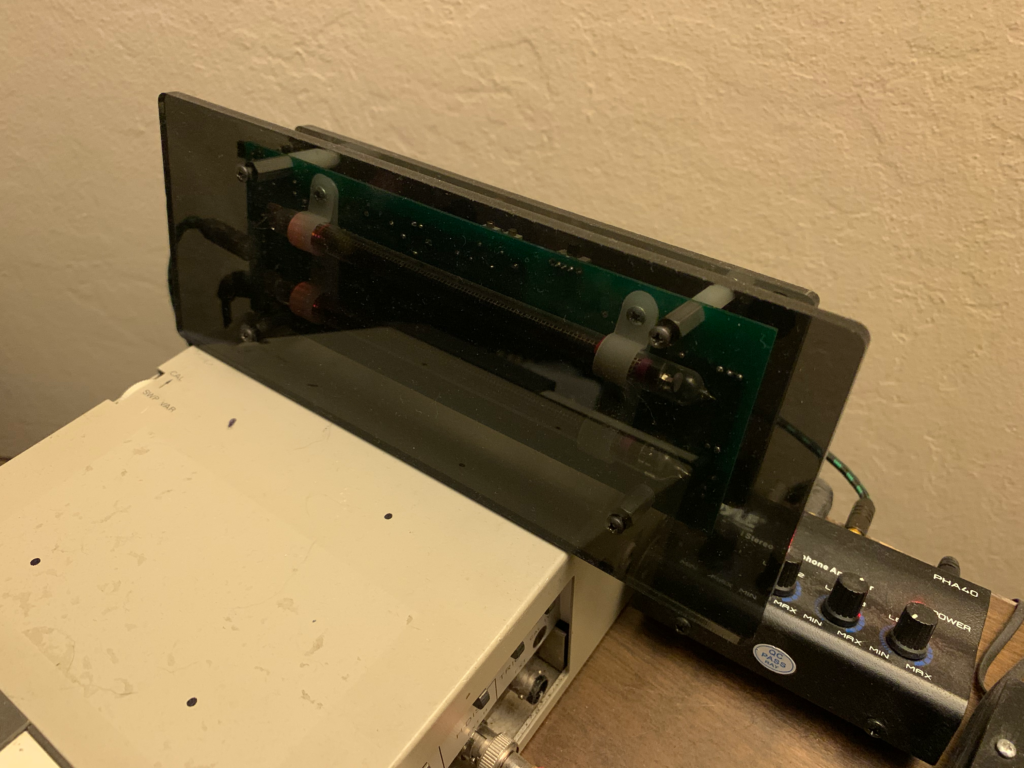
To deal with this, I decided to build an acrylic bender. Basically, acrylic has a very low melting point, so a beefy benchtop power supply can heat up nichrome wire, enough to bend it. Nichrome wire is the same stuff that cooks your toast in the morning, and it can be had rather cheaply off of Amazon. To build an acrylic bender, basically all you need to add to the two aforementioned components is some bits and bobs from home depot. In my case, I got one 24″ x 24″ sheet which I got cut three times to form a base, a working area and a hinge area. You add a small amount of U-channel under the hinges, and voilá, you have a bender.
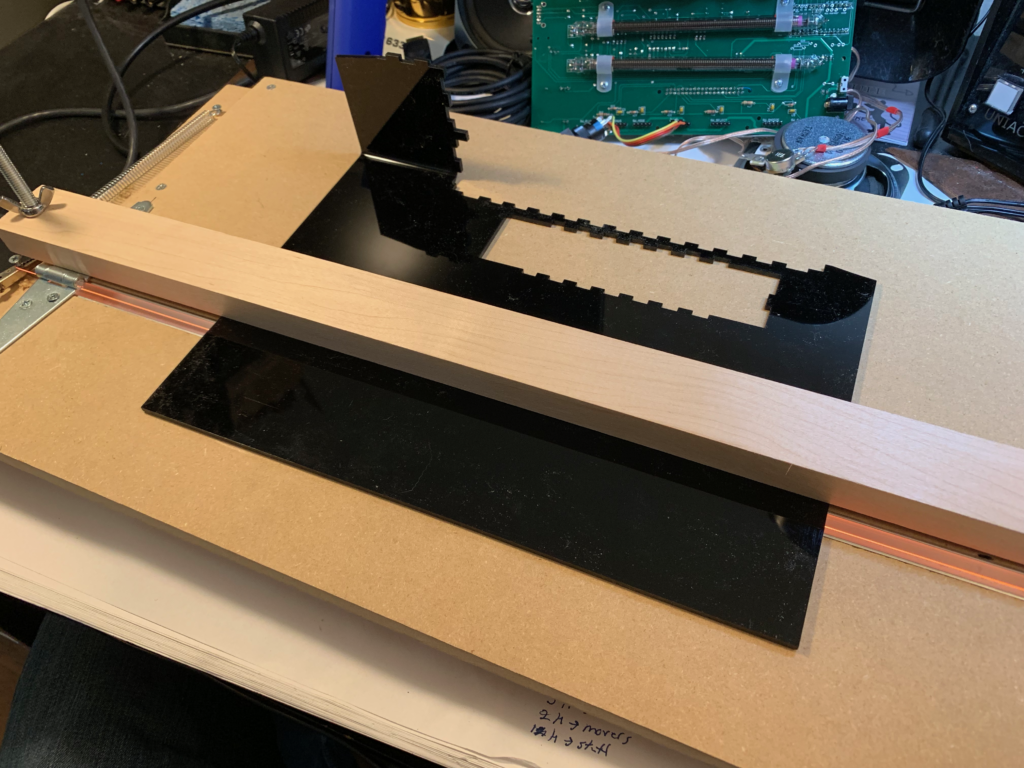
With one afternoon of building, I had myself a jig that was trivial to use and cost less than $50 total, way less than what you’d pay for a professionally made device online.
With that I set about making the enclosure I had in mind:
The angles are pretty easy to make, and I don’t have a protractor to get exact angles (definitely a future improvement)! With my 35V 5A benchtop supply, it only takes about five minutes to get the acrylic hot enough to bend easily, and then you have to hold it in position for three or so additional minutes while it cools off.
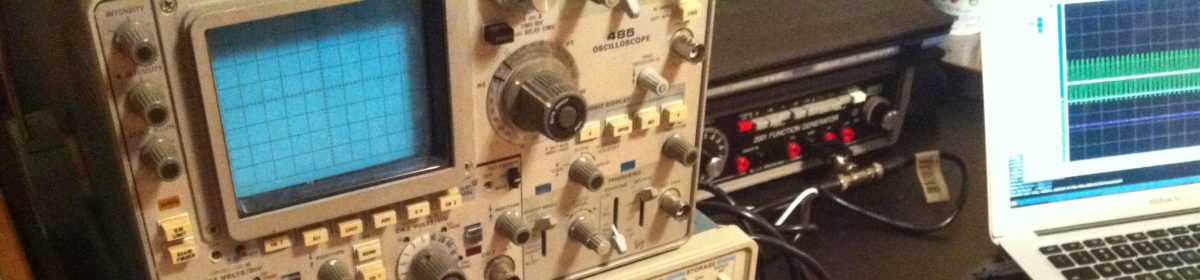
One note, which you can see in the above picture, is the danger of having holes or edges in your acrylic close to the bend line. The hole edges themselves softened and deformed with the bend. In a later revision of the enclousure, I backed off the holes by ~1/2″ and saw no deformation, so it’s not a major drawback.
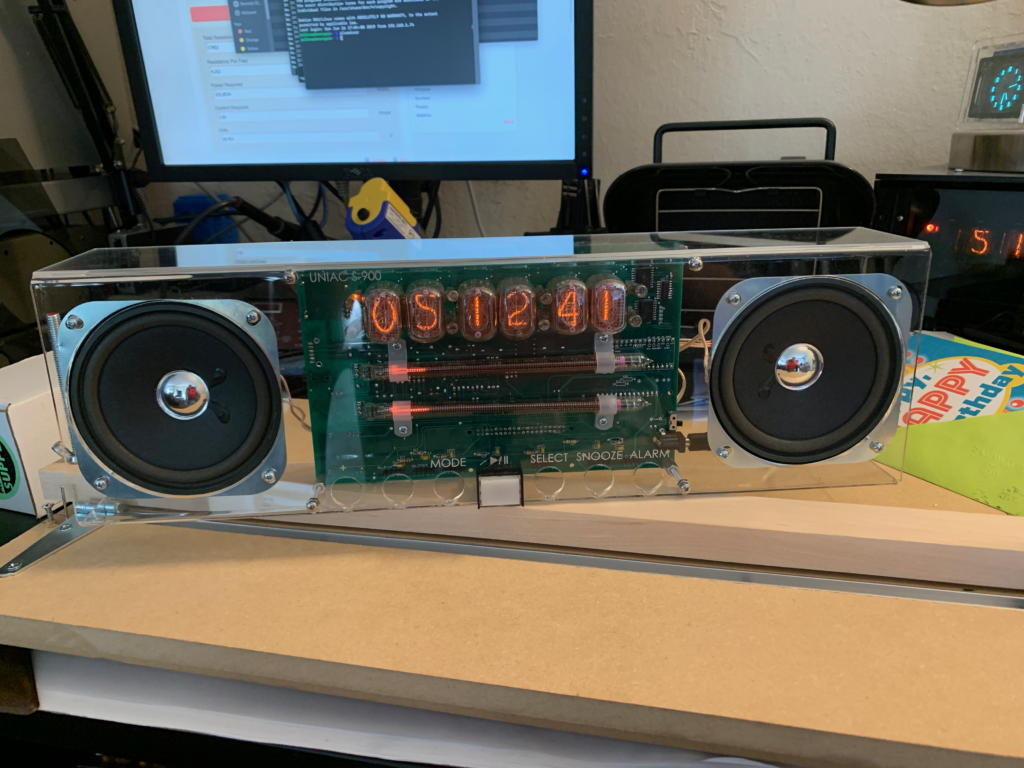
Now, with two bent pieces of acrylic, I can make a neat clamshell enclosure that is sturdy and looks professional. Definitely worth the investment.